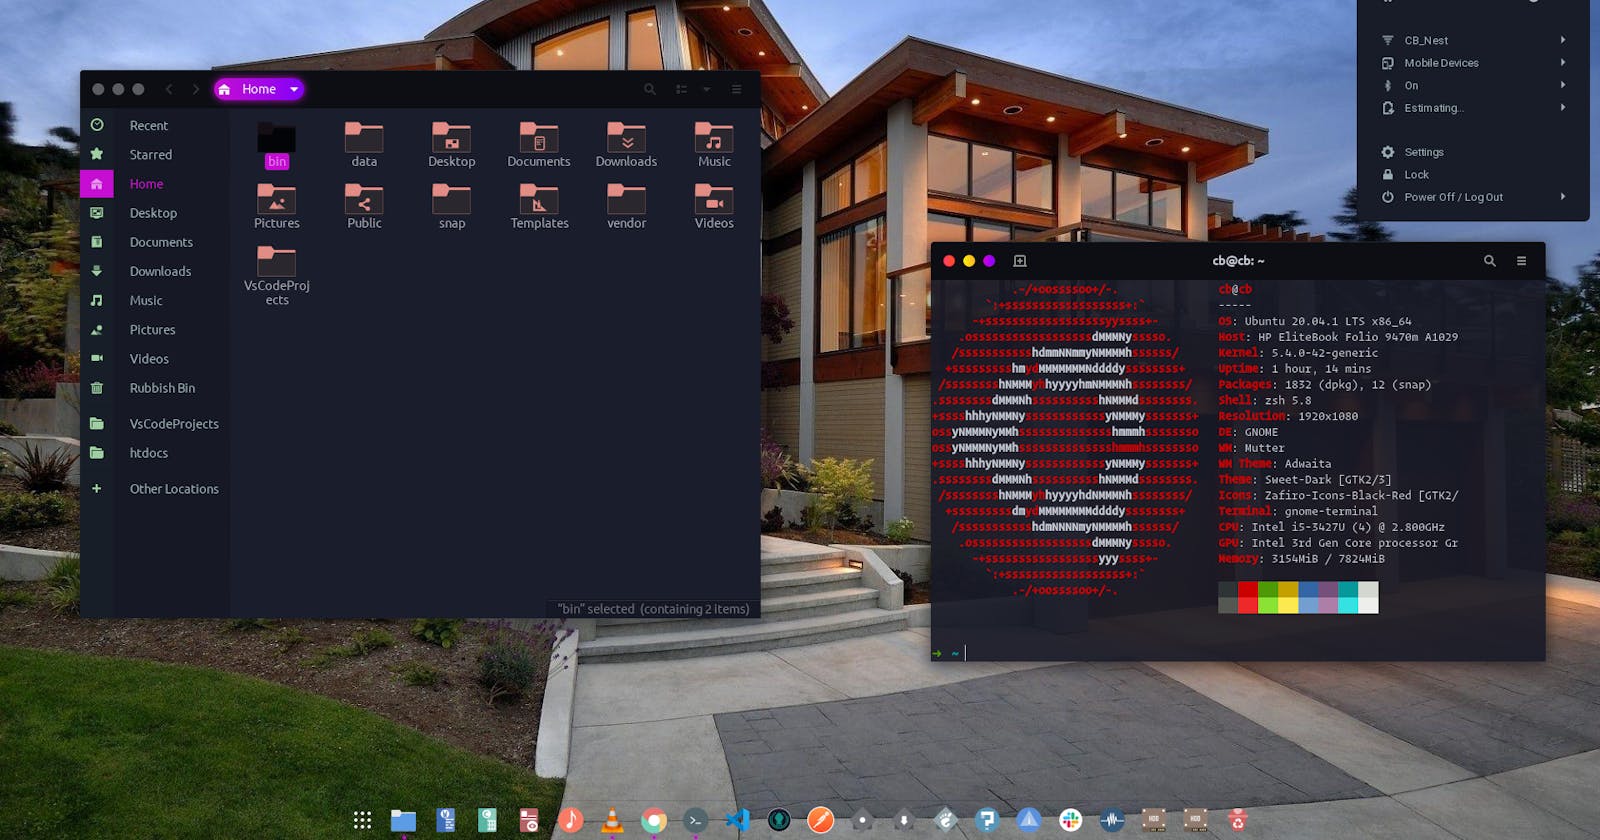


I have been using Ubuntu for a while now and the first things I do for any new install of Ubuntu is to customize it. Unlike Windows and macOS, Linux distros offer a lot of customization and that is one of the reasons I use Ubuntu as my primary OS. I will take you through the steps to get your Ubuntu desktop environment looking like above 👆👆 or even better😉. Let's jump right into it.
Installing Gnome Tweak Tool
A lot of the desktop customization will be made easy by through this tool. Fire up the terminal, command shortcut CTRL + ALT + T.
Make sure you have
universerepository is enabled. Run:sudo add-apt-repository universeInstall gnome-tweak-tool. Run:
sudo apt install gnome-tweak-tool
Installing Gnome Shell Extensions
Once you have the tweak tool installed, launch it from the application menu by typing in tweaks in the search bar. You will be presented with a screen as below.
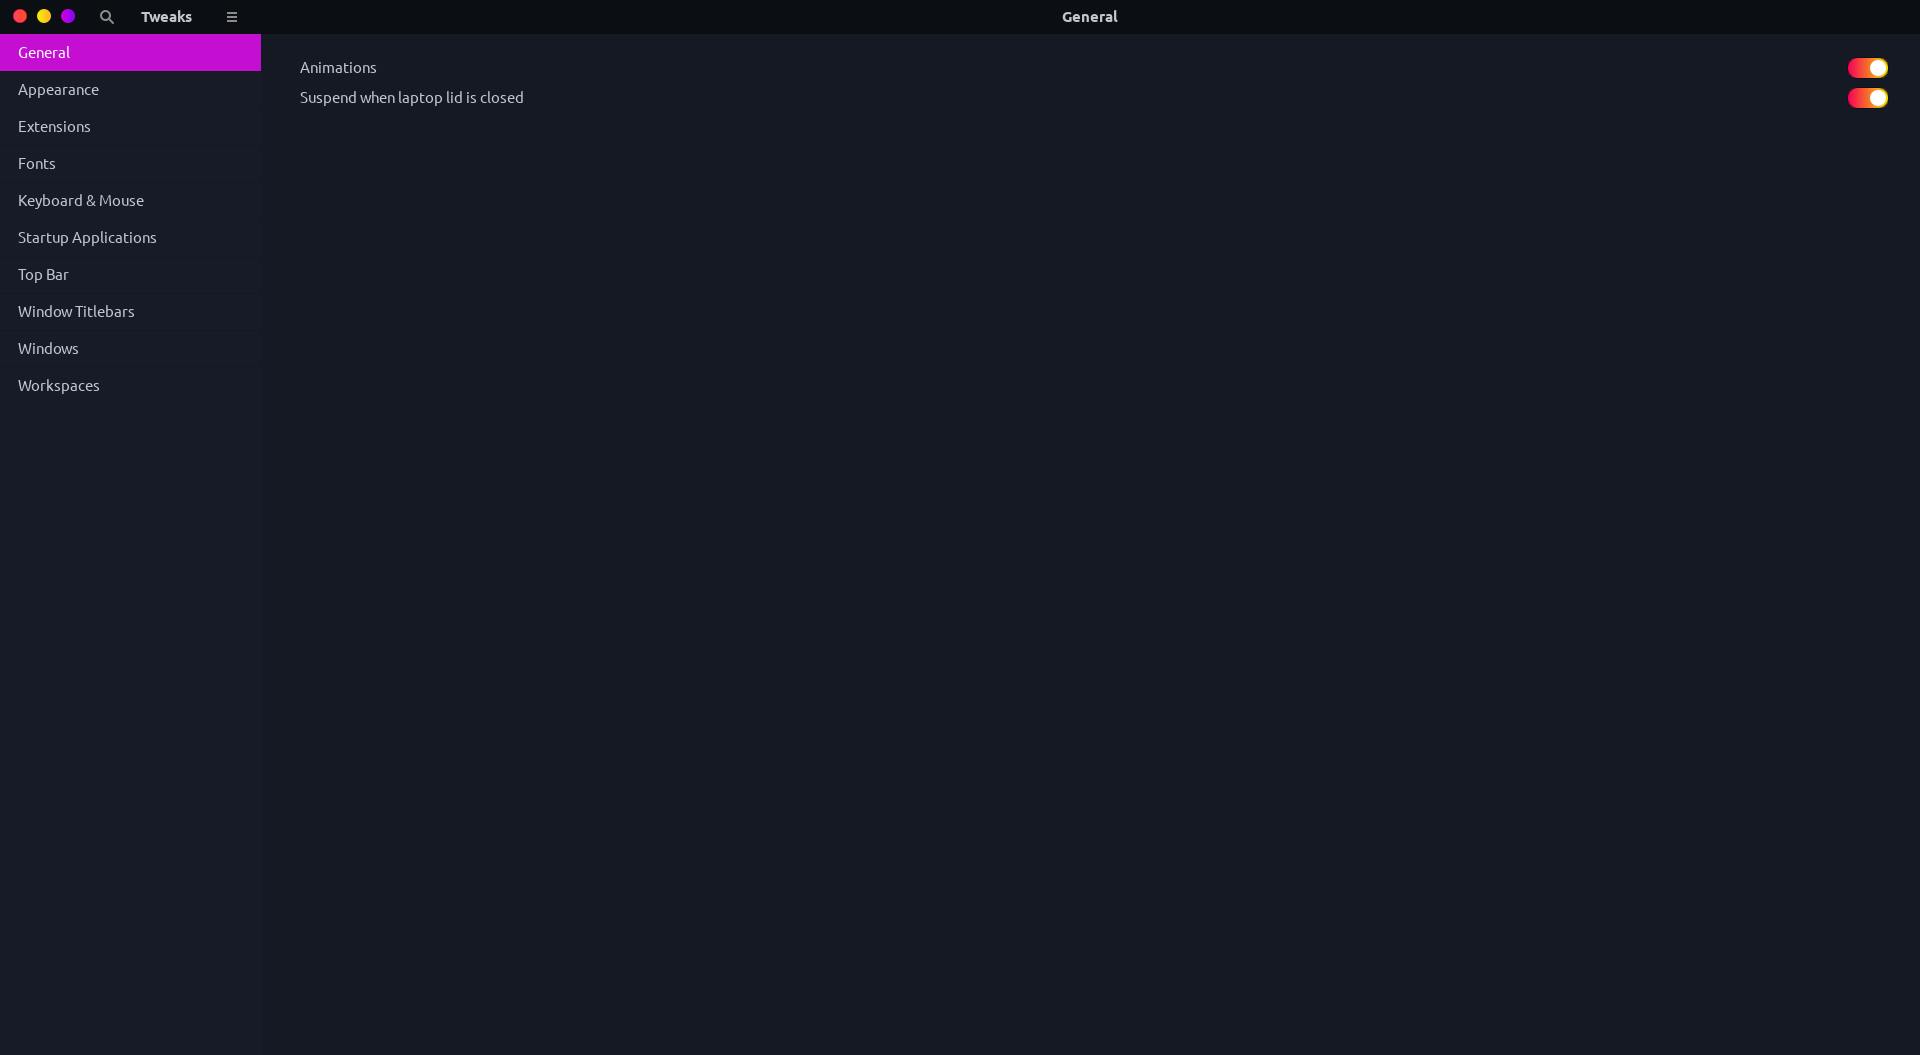
Various customization features are now available to us from this UI. You can customize the desktop appearance, add extensions, change fonts etc. We will start with the extensions. If you open the appearance sections you will notice that the shell option is disabled. To enable this we will install the user shell extension. This can be done several ways but the easiest way I found is by using the browser extension. This only involves 3 steps.
Install the Gnome shell browser extension browser visit Gnome Shell Extensions. Click on the link to install the browser extension.

Install the Host Connector. On the terminal paste in the command:
sudo apt install chrome-gnome-shell- Restart the Gnome Shell. This can be done easily by using the keyboard command shortcut
ALT + F2and type inron the prompt and pressEnter.
Now we can install Gnome shell extensions from the browser. By using visiting the site Gnome Shell Extensions.
Customizing the Theme
With the customizations tool now setup we are ready to tweak the look and feel of our Ubuntu desktop. The components we are going to customize are:
- GNOME Shell Theme. This is the top panel where the clock is, the activity-overview, the notification etc.
- GTK Theme. This will customize the GUI for the applications.
- Icons. The icons (that's all I can say).
- Dash. The applications bar for on the left.
GNOME Shell Theme & GTK3
Install the
user-shellextensions. At the GNOME shell extensions site search foruser shellto install it. It is easy now to install the extensions by just toggling the button on the right. Click install on the prompt.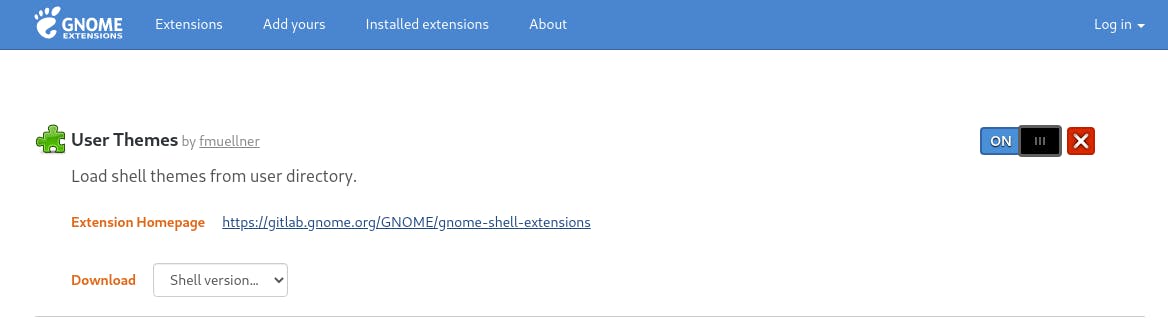
Open Gnome Look this is where you will find a lot of themes and icons that you can use. We will use Sweet themes. Head over to the files section and download the
sweet darkvariant. The theme is loaded with the shell and gtk3 themes. Extract the folder to~/.themesfolder located on your home directory if not available create one with the commandmkdir ~/.themeson your terminal.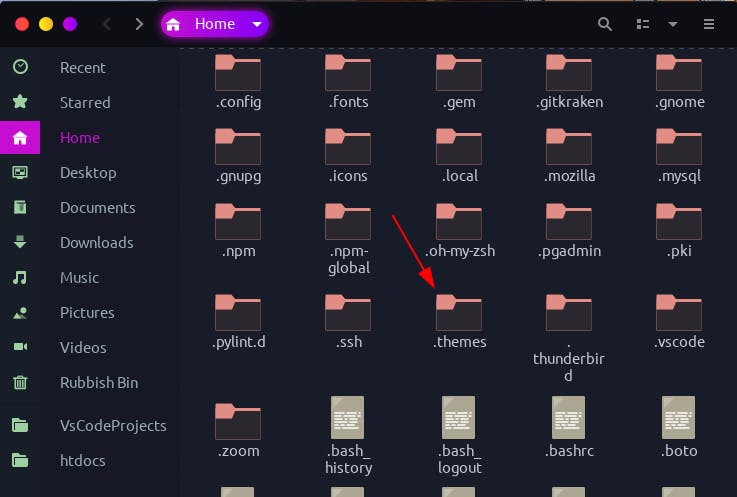
Open the Gnome tweak tool lets get tweaking:
- Select
appearance. - On the applications dropdown select
Sweet-Dark. Changes the GTK3 theme. - On Shell select
Sweet-Dark. Changes the GNOME Shell theme.
- Select
If the changes are not reflected automatically restart the GNOME Shell. ALT + F2 type in r press Enter.
To switch the direction of the windows title bar buttons, open the Windows Tittlebars option to customize as you like.
The Icons
Let's go shopping for icons at Icon Themes. We will use Zafiro Icons on the files tab download Zafiro Black Red Icons. Extract the folder into the ~/.icons folder at your home directory, if the folder does not exist create one by running the command mkdir ~/.icons.
Open the GNOME tweak tool:
- Select
appearance. - On the icons drop down you should see your icons on the options. Your preferred icons are ready. This will change the icons used on your system.
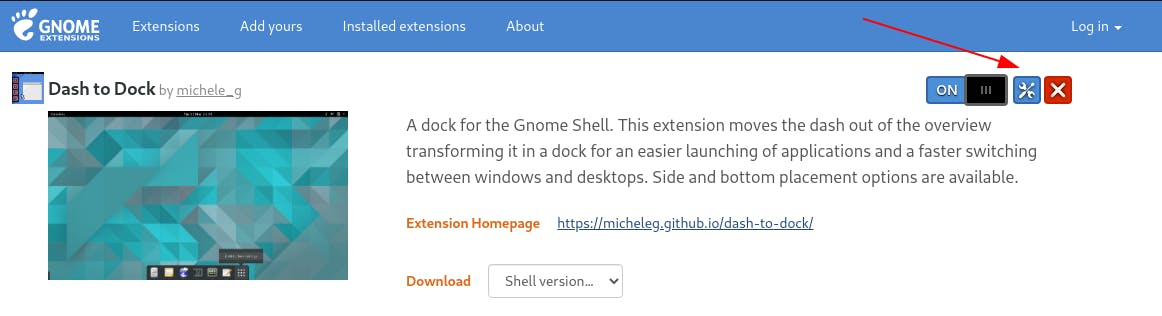
Dash to Dock
- Install the extension the same way we did for user-shell extension at Dash to Dock.
Once installed there will be an extra icon for configurations. Click on it to launch the configurations settings.
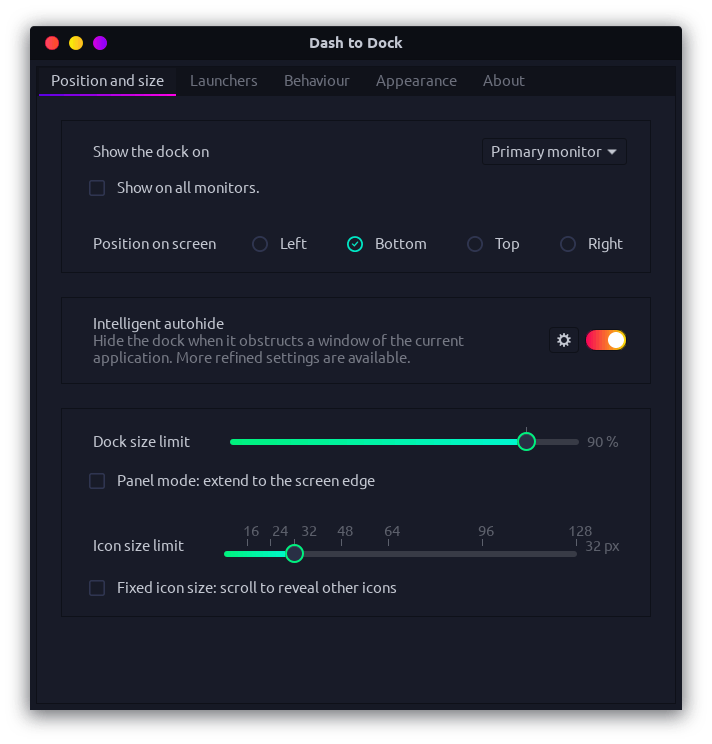
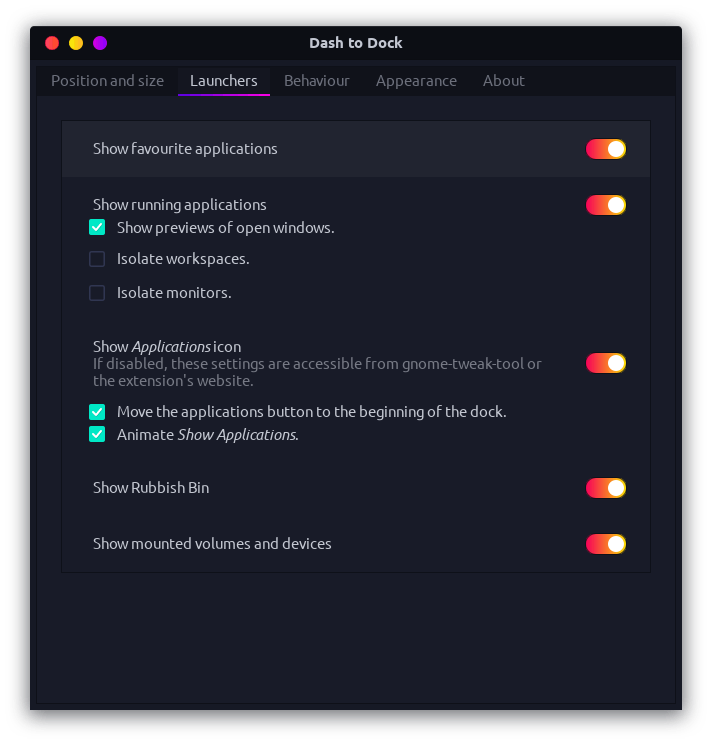
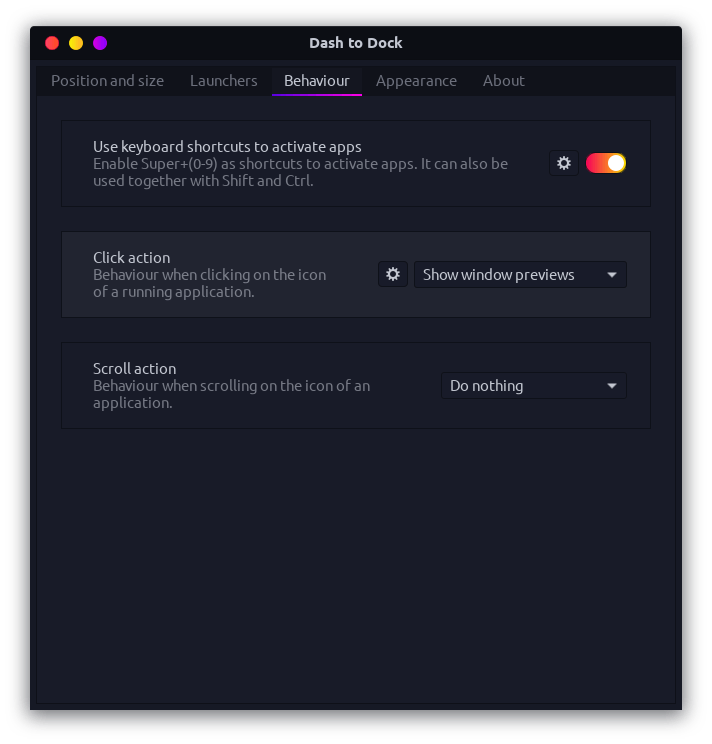
These are my current configurations:
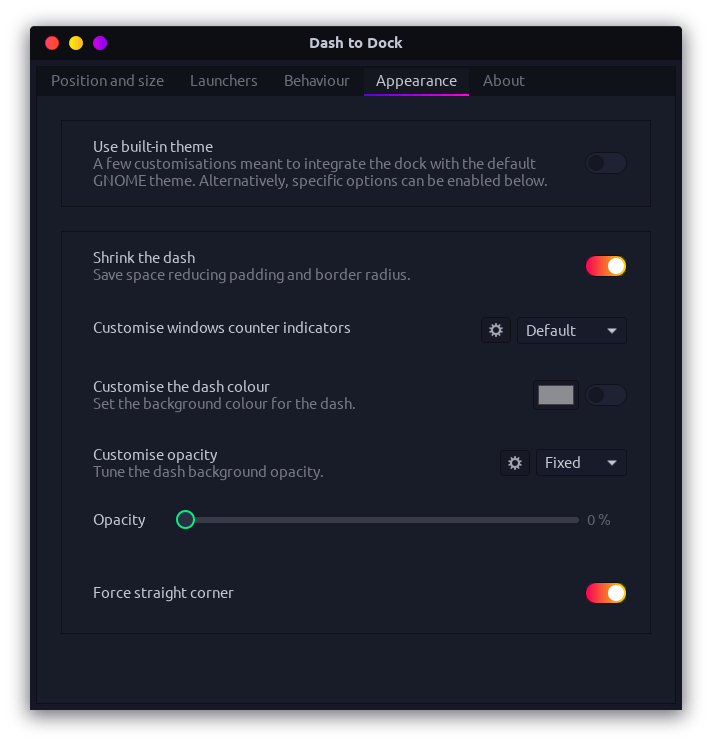
Other configurations not available on the GUI you can set them from the terminal: To Show Apps Button at Left
gsettings set org.gnome.shell.extensions.dash-to-dock show-apps-at-top true

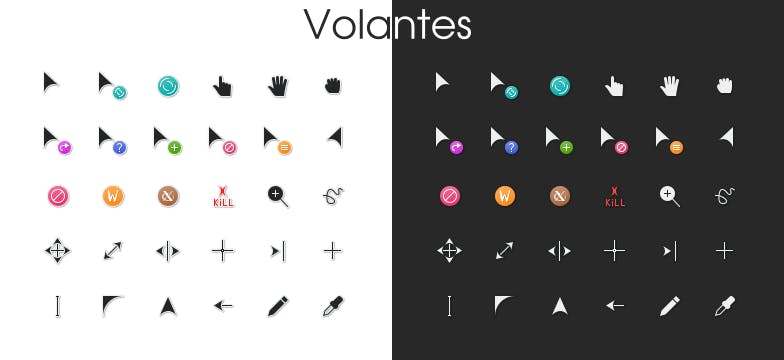
Bonus - The cursor
From Gnome Look I found Volantes Cursors. Download the dark version to match our current theme. Extract the folder to the .icons folder.
On the gnome tweak tool:
- Select the
appearancesection - On the cursor dropdown, you will find volantes cursors. Select it.
The other extensions I use:
- Coverflow Alt Tab this is a nice windows switcher.
- Emoji Selector for quick access of emojis for my git commit messages or on chart apps.
- GSconnect this extension allows me to connect my pc with my phone. Its has nice features you should try it if you don't want to constantly be switching between your phone and PC.
- Removeable Drive menu for quickly disconnecting a drive from the system.
- Screenshot Tool it will give you extra features for screenshot taking.
That's it! You have personalized your desktop enjoy the fresh look.