

In this article, we are going to create a Django app for the project we just configured on the previous article. A project can have multiple apps. Apps inside a project are standalone. That means an app can be plugged into another Django project and work as expected.
Assumptions made:
- You have set up the project as guided here: Setting up a Django project. ✅
- You are excited. 😎
Let's get started.
In the previous blog on Setting up a Django project we went through setting up the project and launching the local development server. You can practise the same and create a new project using the same guide. Use todo as the project name and just like that now you have an idea of what we are building😁.
As a quick setup launch your terminal:
- Make a directory, run:
mkdir todo - Change into the directory, run:
cd todo - Make virtual environment, run:
python3 -m venv venv - Activate the virtual environment, run:
source venv/bin/activate - Install Django:
pip install django - Create a django project:
django-admin startproject todo . - Test everything is ready:
python manage.py runserver
When that done the project directory will look like this:
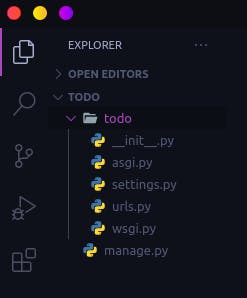
NB: Depending on your editor configuration, you might see a venv folder which is where our virtual environment lives.
1. Creating an app
Now its time to furnish our house. What constitutes a basic todo app? If you said tasks you are right. If you said, anything else let me know in the comments section. It might get added to our project in the next iteration 😉. We are going to create a tasks app inside our project. To do this on your terminal, run:
python manage.py startapp tasks
Note: we could have also used django-admin startapp tasks both commands will give the same result though we will use manage.py more often. Since we are just working with one project, we are keeping it simple. django-admin is preferred when we are working with more than one project and need to switch project settings.
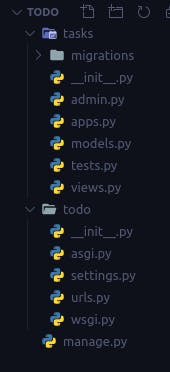
The command will create an app directory in our current working directory, which is the root of the project directory. Open the folder that gets created. You should have a folder structure as below:
2. Explore the app directory
As you have noted, Django creates the app directory and adds some files inside the app directory. The files will help us in getting started with writing our code than setting up a directory structure. That is just Django staying true to its philosophy. Inside the tasks directory, there is:
migrationsfolder - contains files that will record the changes we have made to our models.models.py- contains python classes that represent a database table in the database. Inside the class are fields which represent actual database fields and methods which you can use to define your model behaviours.views.py- contains python functions or classes that determine what HTML templates get rendered and with what data.apps.py- When they are specific app configurations that you want to add they go here.tests.py- contains tests for where test-driven-development is involved.admin.py- to add our model to the admin interface (Ooops I spoke soon 🤭). Yes, Django does provide us with a full house admin interface that we can manage our models from, pretty fantastic!!😎__init__.py- this makes ourtasksdirectory a python package. I love to think of it as a python made port that allows us to ship things outside of the directory.
Great now that we are familiar with what the different files its time to tell Django about our discovery.
3. Registring the app
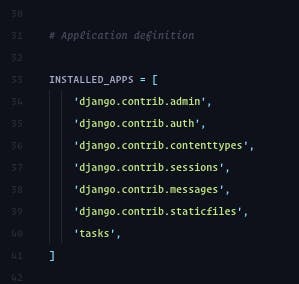
To register the tasks app on our Django project open the setttings.py inside todo directory. We are going to edit the INSTALLED_APPS list. Scroll down you will find the list of installed apps which are already configured by default when we generated the project folder. You there now, add tasks to the list.
4. Writing our first view
Let us try to understand what views are by writing one. Inside the views.py replace the code inside with the code below.
from django.shortcuts import render

def index(request):
  return render(request, 'index.html')
We have created a python function named index which returns a template page called index.html. Inside the tasks directory, add a folder named templates. Navigate inside the templates directory and create index.html file. Open index.html then add some text. You can copy from below:
<h1>Hello Django World!</h1>
To access the index page, we need to define some URL to get there. Return to the tasks directory and create a urls.py file and paste
the following:
from django.urls import path
from tasks import views

urlpatterns = [
    path('', views.index),
]
This file is where all URLs that relate to the tasks app will be defined. I know you are asking what is happening with all this urls.py and templates folder we will go through them in details in the next one. For now, let's create a minimal setup.
Open the urls.py inside todo directory. Inside the file, add the tasks app urls. The todo/urls.py module will look now have the code below:
from django.contrib import admin
from django.urls import path, include

urlpatterns = [
    path('admin/', admin.site.urls),
    path('tasks/', include('tasks.urls'))
]
When you add tasks to our domain, Django looks for the path inside tasks/urls.py. The resulting path will call index function, which we defined in views.py which renders index.html.
5. Start the server
Once you have those URLs wired up, let's see it in action. On your terminal start the server, run:
python manage.py runserver
Follow the server link provided. You will notice the results is Page Not Found this is because the URL path to tasks is not complete, pun intended😁. On the browser URL, append tasks. The result should be the index page shown below:
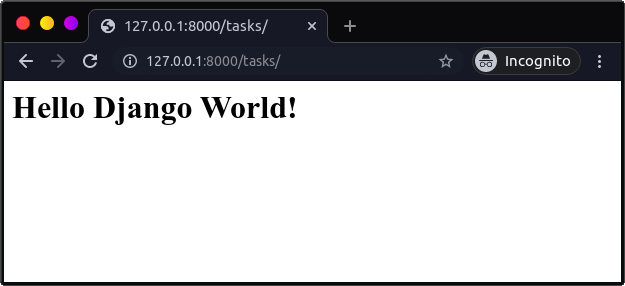
🥳🥳🥳 We have our app now setup. Next, we will begin building on it. Catch you in the next one.